I. Introduction of Vernier Caliper
A. Definition of Vernier Caliper
Least Count of Vernier Calliper
The least count of vernier calipers is also known as the vernier constant—the difference between one main scale division and one vernier scale division.
It is mathematically given as:
| V.C. = 1 MSD – 1 VSD |
When there are n divisions on the vernier scale, which coincides with (n-1) division on the main scale, then the least count of vernier caliper is:
| Therefore, the least count of the vernier caliper is 0.1 mm. |
Where,
- VC is the vernier constant
- MSD is the main scale division
- VSD is the vernier scale division
- LC is the least count
What Is Zero Error?
Zero error is defined as the condition in which the measuring device registers a reading when there should not be any reading.
The zero error of the vernier caliper is calculated as:
Actual reading = Main scale + Vernier scale – (Zero error)
There are two types of zero error:
- Positive zero error: When the jaws of the vernier caliper are closed, the reading is positive and away from the actual reading of 0.00 mm. For instance, if the reading is 0.08 mm, the zero error is +0.08 mm.
- Negative zero error: When the jaws of the vernier caliper are closed, the reading is negative and away from the actual reading of 0.00 mm. For instance, if the reading is 0.10 mm, the zero error is -0.10 mm.
Solved Examples
Example 1:
If the jaws of the vernier calipers are in contact with each other, then determine the zero error of the vernier caliper if the VSD is 3.
Solution:
Given:
The jaws of the vernier caliper are in contact with each other.
Therefore, the least count of the vernier caliper is given as:
L.C. = MSD – VSD
LC = 1 – (9/10) = 0.1 mm
The main scale reading, MSR = 0 mm
The vernier scale reading, VSR = 3
Therefore,
Zero error = MSR + VSR x LC
Zero error = 0 + 3 x 0.1 = 0.3 mm
Example 2:
1 mm marks are present on the main scale of the vernier scale. The total number of divisions on the vernier scale is 20, which matches the 16 main scale divisions. Calculate the least count of this vernier scale.
Solution:
Given:
One main scale division, MSD = 1 mm
20 vernier scale divisions, VSD = 16 main scale divisions, MSD
Therefore, 1 VSD = 16/20 MSD = 0.8 mm
The least count, LC = 1 MSD – 1 VSD = 1 – 0.8 = 0.2 mm
How to Read Vernier Calliper?
- The first step is to measure nothing to check if the main and the vernier scales are aligned.
- There is no zero error when the main scale reading and the vernier scale reading are at zero.
- Now, place a ball between the two jaws of the vernier scale.
- Look at the 0 mark on the vernier scale lining with the main scale.
- That gives the main scale reading.
- Next, look for the point on the vernier scale, which is aligned with the main scale, which gives the vernier scale reading.
- It is important to note that most of the time, the readings will be in decimals.
- The number before the decimal point is the main scale reading, while the number after the decimal point is the vernier scale reading.
B. Importance of Vernier Caliper in Measuring Objects
C. Brief History of Vernier Caliper
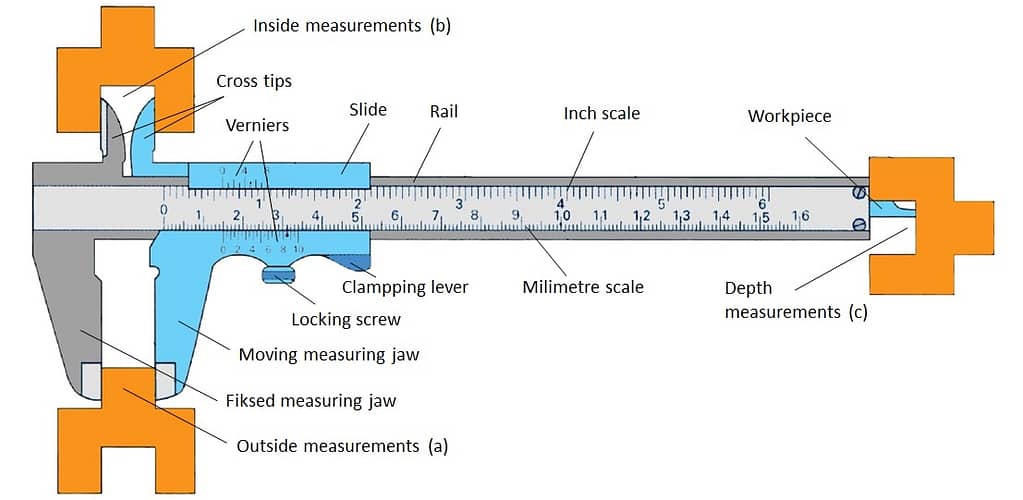
II. Components of Vernier Caliper
A. Main Scale
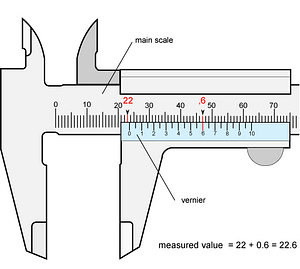
B. Vernier Scale
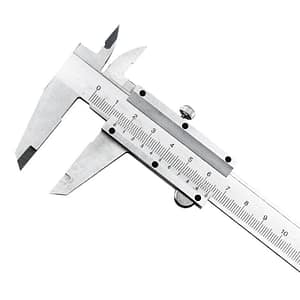
The main (stationary) scale is divided into millimeters on the Vernier caliper. The Vernier (moveable) scale is 9 mm long and has ten divisions. Each division on the Vernier scale is 0.9 mm long, or 0.1 mm less than the main scale divisions.
C. Jaws
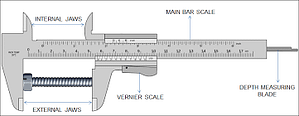
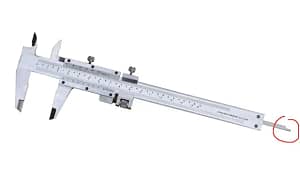
D. Depth Bar
E. Locking Screw
F. Dial Indicator (Optional)
III. How to Use a Vernier Caliper/how is a vernier caliper used
A. Preparation
To measure the width of an object, the object is placed between the caliper’s jaws. The sliding jaw is then moved until the object is gripped firmly between the jaws. Find where the 0 mark of the vernier scale lines up on the main scale. In this case, it is between 1.1 and 1.2 cm.
B. Measuring External Dimensions
What is the External Dimension?
How do you find the external diameter of a vernier caliper?
C. Measuring Internal Dimensions
Let n be the number of the vernier scale division, which coincides with the main scale division. Rotate the vernier caliper at 90° and repeat steps 4 and 5 to measure the internal diameter perpendicularly. To measure the depth, find the total reading and zero correction.
How internal dimensions are measured using vernier caliper?
D. Measuring Depth
To measure the depth, find the total reading and zero correction. The edge of the main scale of the vernier caliper should be placed on the peripheral edge. Care should be taken to make the strip go freely inside the beaker and its depth.
E. Measuring Step
How to measure steps using a vernier caliper?
Step 1 – Place the sliding jaw against the upper step of the object. Open the caliper slightly.
Step 2 – Open caliper jaws. Open the caliper’s jaws using the thumb screw until the fixed upper jaw contacts the lower step.
Step 3 – Turn Lock Screw. …
Step 4 – Read Measured Value.
IV. How to read a vernier caliper in mm?
- First, make sure that the caliper is set to read in millimeters. Look for the “mm” marking on the scale.
- Look at the main scale (the larger scale) and identify the largest whole millimeter to the left of the zero mark. This will give you the whole number part of the measurement.
- Look at the vernier scale (the seven smaller scales) and find the line that perfectly aligns with one of the lines on the main scale. This will be your reference line.
- Count the lines on the vernier scale to the right of the reference line. Each line on the vernier scale represents 0.1 millimeters, so you must multiply the number of lines by 0.1 to get the decimal part of the measurement.
- Add the whole number and decimal parts together to get the final measurement in millimeters.
For example, if the main scale reading is 4 mm and the vernier scale reference line lines up with the 0.5 mm line, and there are 7 lines to the right of the reference line on the vernier scale, then the total measurement would be:
4 mm + (0.5 mm + 7 x 0.1 mm) = 4.57 mm
V. Types of Vernier Caliper
A. Standard Vernier Caliper B. Digital Vernier Caliper C. Dial Vernier Caliper D. Vernier Height Gauge E. Vernier Depth Gauge
A. Standard Vernier Caliper
A vernier caliper is defined as a measuring device that is used for the measurement of linear dimensions. It is also used to measure the diameters of round objects with the help of the measuring jaws.
B. Digital Vernier Caliper
What is a Digital Vernier Caliper?
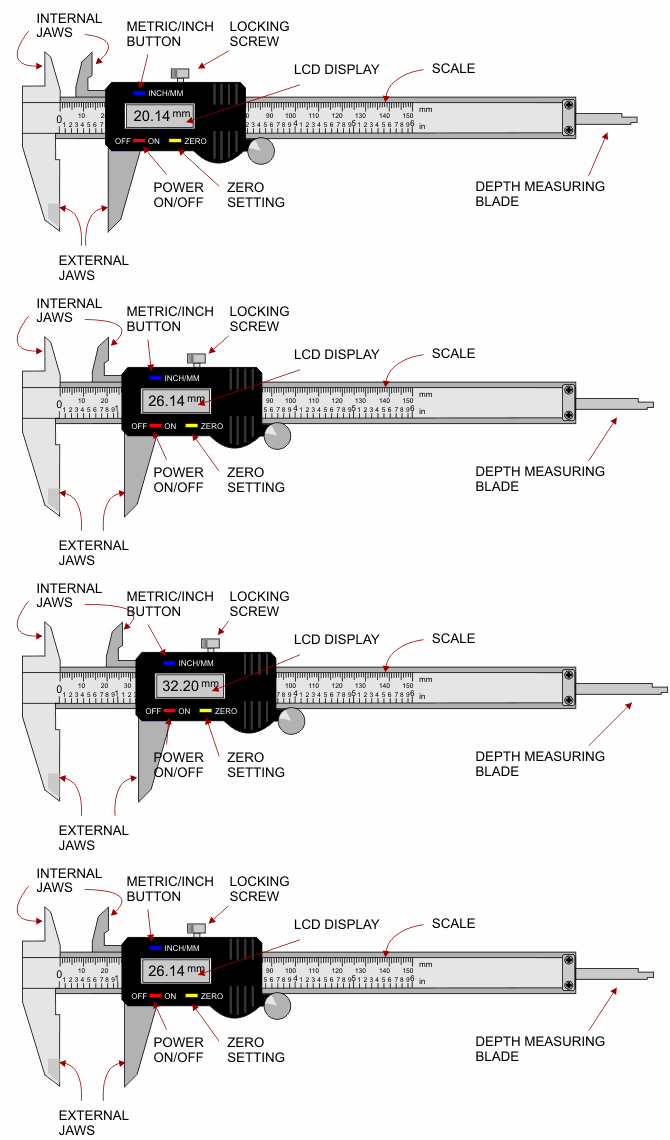
A caliper is a device with a measuring scale and a “jaw” that measures an object’s dimensions. A vernier caliper is a specific type with two scales, including a vernier scale. A vernier scale is an auxiliary scale that appears alongside the instrument’ ‘s principal scale, giving you a higher resolution option. You’ll find vernier scale markings between the graduation markings on the main scale. Some vernier scales allow for a measurement resolution as precise as 0.01mm.
C. Dial Vernier Caliper
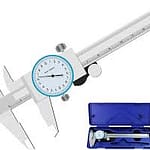
What is dial Vernier calipers?
D. Vernier Height Gauge
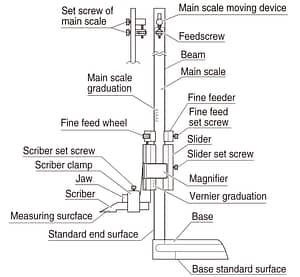
What is Vernier height gauge and its parts?
E. Vernier Depth Gauge
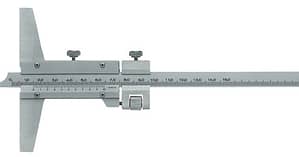
What is vernier depth gauge?
V. Advantages and Disadvantages of Vernier Caliper
There are two main advantages of the vernier caliper:
- The measurements provided by the vernier caliper are accurate and precise.
- It can be used for measuring both inner and outer surface dimensions.
What is the disadvantage of a micrometer caliper?
As for the disadvantages, micrometers do have a naturally limited range. Bigger objects might require multiple or larger micrometers, which can be expensive.VII. Tips for Maintaining Vernier Caliper
A. Cleaning:
Cleaning Procedure
Switch ‘OFF’ the Vernier Caliper by pressing the ‘OFF’ button. Clean the equipment with the help of a dry non, shredding cloth. After cleaning, put the Vernier Caliper in the box.
B. Lubrication
Apply a small drop of oil to the beam of the caliper, clean it off with a cloth and slide the vernier scale backward and forwards a couple of times. Vernier calipers should be stored somewhere dry and humid-free.
C. Storage
Calipers should be stored in an environment free of heat, dust, humidity, oil, and mist. When storing electronic calipers for an extended period, make sure also to remove the battery. Calipers should NEVER be stored near anything magnetic (such as a magnetic work table) to avoid being magnetized.
D. Calibration
Place the standard Lengths of 25 mm between the measuring jaws of the caliper at three different positions and determine the length. Determine the average length and record the observations. Repeat the above procedure for the remaining standard lengths (50 mm, 75 mm, 100 mm and 125mm).
VIII. Conclusion
A. Summary of Vernier Caliper
In summary, the vernier caliper provides precise and accurate measurements of both widths and diameters of objects. Navigators, surveyors and scientists use the tool to increase precision in their measurements. This instrument has two pairs of jaws: upper and lower.
IX. FAQs
A caliper should be accurate too. 001”. There are cheap or shoddy quality ones that will fail to meet this accuracy, but when most people think about calipers, they expect it to be accurate too. 001”.
Q. How To read a metric vernier caliper, follow these steps:
- Look at the main scale (the long scale with centimeter markings) and note the closest whole centimeter to the zero mark on the Vernier scale (the smaller scale on top of the main scale).
- Next, look at the Vernier scale and find the line that aligns exactly with a line on the main scale. This is your first reading.
- Determine which marking on the Vernier scale comes closest to lining up with a line on the main scale. This is your second reading.
- Add the two readings together to get the total measurement.
For example, if the main scale reading is 3 cm and the Vernier scale reading is 0.4 cm, the total measurement is 3.4 cm.
To read a Vernier caliper with a resolution of 0.02 mm, follow the same steps as above, but note that the Vernier scale has additional markings between the lines on the main scale. Each line on the Vernier scale represents 0.02 mm.
To read a Vernier caliper with a resolution of 0.05 mm, again follow the same steps, but note that each line on the Vernier scale represents 0.05 mm.
The formula for reading a Vernier caliper is:
Main scale reading + (Vernier scale reading x Vernier scale resolution)
For example, if the main scale reading is 4 cm and the Vernier scale reading is 0.8 cm on a Vernier caliper with a resolution of 0.02 mm, the total measurement would be:
4 cm + (0.8 cm x 0.02 mm) = 4.016 cm
To practice reading a Vernier caliper, try measuring different objects with varying levels of precision. You can also find Vernier caliper reading exercises online.
Remember to read the main scale first before reading the Vernier scale, and always pay attention to the resolution of your particular Vernier caliper.
- Q. What is a Vernier caliper?
- A. A Vernier caliper is a precision measuring tool used to measure dimensions with high accuracy. It consists of a main scale with a millimeter or centimeter markings and a smaller Vernier scale that slides along the main scale and provides additional precision.
- A. How do I read a Vernier caliper?
- A. To read a Vernier caliper, first note the closest whole unit on the main scale, then find the line on the Vernier scale that lines up exactly with a line on the main scale. Finally, determine which marking on the Vernier scale comes closest to lining up with a line on the main scale. Add the two readings together to get the total measurement.
- Q. What is the resolution of a Vernier caliper?
- A. The resolution of a Vernier caliper refers to the smallest increment that can be measured with the tool. Different Vernier calipers have different resolutions, with some models able to measure as small as 0.02 mm.
- Q. How accurate are Vernier calipers?
- A. Vernier calipers are highly accurate measuring tools, with some models able to measure to within 0.05 mm or better.
- Q. What are Vernier calipers used for?
- A. Vernier calipers are commonly used in manufacturing, engineering, and scientific applications to measure highly precise dimensions. They are often used to measure objects’ diameter, materials’ thickness, and holes’ depth.
- Q. How do I maintain my Vernier caliper?
- A. To ensure the accuracy of your Vernier caliper’s accuracy, keep it clean and dry, store it in a protective case when not in use, and periodically check its accuracy against a calibrated standard.
- Q. How do I convert Vernier caliper readings from millimeters to inches?
- A. To convert a Vernier caliper reading from millimeters to inches, divide the millimeter reading by 25.4. For example, a reading of 25.4 mm would be equivalent to 1 inch.
- Q. How do I choose the right Vernier caliper for my needs?
- A. When choosing a Vernier caliper, consider the level of precision you need, the range of measurements you will be making, and any specific features you may require, such as a digital display or a depth gauge.
- Q. How to read a Vernier caliper in cm?
- A. To read a Vernier caliper in centimeters, look at the main scale and note the closest whole centimeter to the zero mark on the Vernier scale. Next, find the line on the Vernier scale that aligns exactly with a line on the main scale. Finally, determine which marking on the Vernier scale comes closest to lining up with a line on the main scale. Add the two readings together to get the total measurement in centimeters.
- Q. How to read a Vernier caliper with a resolution of 0.02mm? Vernier caliper 0.02 mm?
- A. To read a Vernier caliper with a resolution of 0.02mm, look for the additional markings between the lines on the Vernier scale. Each line on the Vernier scale represents 0.02mm. Follow the same steps as for reading a Vernier caliper in centimeters.
- Q. How to read a Vernier caliper with a resolution of 0.05mm? How to read vernier caliper 0.05 mm?
- A. To read a Vernier caliper with a resolution of 0.05mm, each line on the Vernier scale represents 0.05mm. Follow the same steps as for reading a Vernier caliper in centimeters.
- Q. What is the Vernier caliper reading formula?
- A. The formula for reading a Vernier caliper is: Main scale reading + (Vernier scale reading x Vernier scale resolution)
- Q. What are some Vernier caliper reading exercises?
- A. To practice reading a Vernier caliper, try measuring different objects with varying levels of precision. You can also find Vernier caliper reading exercises online.
- Q. Can you give me a Vernier caliper reading example?
- A. Suppose the main scale reading is 3 cm and the Vernier scale reading is 0.4 cm on a Vernier caliper with a resolution of 0.02mm. To calculate the total measurement:
Main scale reading = 3 cm Vernier scale reading = 0.4 cm Vernier scale resolution = 0.02 mm
Total measurement = Main scale reading + (Vernier scale reading x Vernier scale resolution) Total measurement = 3 cm + (0.4 cm x 0.02 mm) Total measurement = 3.008 cm
- Q. How do you read a metric Vernier caliper?
- A. To read a metric Vernier caliper, follow the same steps as for reading a Vernier caliper in centimeters, noting the additional markings on the Vernier scale that provide more precise measurements.
- Q. How do you choose the right Vernier caliper for your needs?
- A. Consider the level of precision you require, the range of measurements you will be making, and any specific features you may require, such as a digital display or a depth gauge.
- Q. Do you read the main or Vernier scales on a Vernier caliper?
- A. You need to read the main and Vernier scales on a Vernier caliper to get an accurate measurement. The main scale provides the whole unit of measurement, while the Vernier scale provides the fractional part of the measurement.
- Q. What is the accuracy of a Vernier caliper?
- A. A Vernier caliper’s accuracy depends on the scale’s resolution. For example, a Vernier caliper with a resolution of 0.02mm has an accuracy of +/- 0.02mm.
- Q. How do you take care of a Vernier caliper?
- A. To take care of a Vernier caliper, keep it clean and dry and store it in a protective case. Avoid dropping or banging the caliper; use it only for its intended purpose.
- Q. What are some common uses of a Vernier caliper?
- A. A Vernier caliper is commonly used to measure the thickness or diameter of small objects, such as wires, bolts, or sheets of material. It can also be used to measure the depth of holes or slots or check other measuring tools’ accuracy.
- Q. Can a Vernier caliper be used to measure angles?
- A. No, a Vernier caliper is not designed to measure angles. It is used primarily for linear measurements.
- Q. How do you convert Vernier caliper readings to other units of measurement?
- A. To convert Vernier caliper readings to other units of measurement, use a conversion factor to convert the reading to the desired unit. For example, to convert a reading in millimeters to inches, divide the reading by 25.4.
- Q. How do you adjust a Vernier caliper?
- A. To adjust a Vernier caliper, use the adjustment screw to align the jaws. Make sure the caliper is zeroed before use.
- Q. Can a Vernier caliper be calibrated?
- A. A Vernier caliper can be calibrated using a calibration standard or a calibration service. Regular calibration ensures the accuracy of the caliper over time.
- Q. What are the different types of Vernier calipers?
- A. There are several Vernier calipers, including digital Vernier calipers, dial Vernier calipers, and traditional Vernier calipers. Some Vernier calipers include additional features like depth gauges or step measurement capabilities.
- Q. How do you read a digital Vernier caliper?
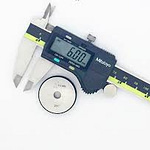
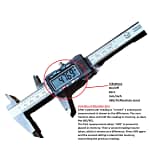
- A. To read a digital Vernier caliper, read the measurement on the digital display. The digital caliper automatically displays the measurement in the desired unit of measurement with high precision and accuracy.
- Q. Can a Vernier caliper be used for both internal and external measurements?
- A. Yes, many Vernier calipers have internal and external jaws, allowing them to be used for various measurement applications.
- Q. What is the difference between a Vernier caliper and a micrometer? A. A Vernier caliper measures dimensions using two jaws that slide along a linear scale, while a micrometer measures dimensions using a threaded screw mechanism. Micrometers typically offer higher precision and are used for smaller measurements than Vernier calipers.

Keep this going please, great job!
Your articles are extremely helpful to me. Please provide more information!